Guest Post : Teriyaki Chicken


Being a sudden backup chef when my wife is busy taking care of our 2 little precious is simply a head-scratching job. Thinking of what to cook in such a short time is hard when both of us are always wondering what to eat.

Well this time, I've make the call without letting her know what I'll be cooking. I surprised her with this simple yet a fullsome meal dinner which is also my all-time my favorite, Teriyaki Chicken on Japanese Rice. Of coz this was not my first attempt on cooking this dish.

And so I quickly went to nearby Tesco and grabbed 2 chicken whole legs and rushed home, cook the rice, deboned the chicken, cook it...and Woohoo! A delicious Teriyaki Chicken Don is ready. All these done within one and a half hour. 5 out of 5 she rated it. Maybe she's hungry hehe.

Having to see her finished the entire bowl without any rice left is very satisfying. Though I may not be as good cook as her but sometimes I just nailed it. I just need to have few recipes in my mind for that the last minute task. I hope this recipe will help you guys out there to cook on short time like me. Cheers and enjoy!


TERIYAKI CHICKEN

Prep Time  : 15 mins
Cook Time : 30 mins
Total Time : 45 mins
Serves       : 2 pax

Ingredients:
2 whole chicken legs (deboned)
1 tsp salt
1 tsp black pepper
1 tbsp vegetable oil
75ml soy sauce
3 1/2 tbsp sugar + 3 tbsp sugar (Updated on 23 Jan - Improvised)
1 tsp sesame oil
1 clove garlic
130ml hot water
Japanese mayonaise (recommended)
Spring onion for garnish

Directions:
1. Marinade the deboned chicken with salt, black pepper and vegetable oil for 10 mins.

2. In a small bowl, prepare the sauce mixture. Mix well soy sauce, sugar, sesame oil and hot water.

3. In a frying pan, heat a tablespoon of oil on medium high heat. Pan fried the chicken, skin side down first till golden brown, approx. 5 mins on each side. Cover with a lid while frying. Dish out and leave aside.

4. In the same frying pan, with the remaining oil from the frying, saute the garlic until fragrant. Pour the sauce mixture and bring to a boil. Continue cooking the sauce to reduce for approx. 10 mins.

5. Place the pan fried chicken, skin side up on the sauce mixture, turn down the heat to low. Let it simmer for approx 5 mins. By now the sauce has been well caramelized and become a thick glaze. Using a spoon, scoop the sauce onto the skin until the whole skin is well coated.

Notes:
● Japanese mayo will give a creamier taste.

● You may add 2 tbsp mirin if you like.


#msyummyliciousrecipe
Make this recipe? Don't forget to snap a photo of it and tag #msyummyliciousrecipe on social media! I would love to see them! Enjoy my recipe!


First Commenter...(+/-)
.....

Homemade Sensory Playdough For Toddlers


My daughter loves playing with dough. Whenever i work with dough recipe, she would come and ask to join along. Usually I would give her a ball of dough to play with and she could play throughout my whole baking time. This gives me an idea to make her some homemade sensory playdough from edible ingredients.

After googling for a good half an hour, I decided to give this Martha Stewart playdough recipe a try. Because I am a baker myself, I know that a cooked dough is definitely a better choice from an uncooked dough. They are much more softer and pliable than the latter.


And true enough, this playdough is very smooth, soft and pliable. For smelling senses, I've added a few drops of different artificial flavours for each colors. My daughter loves them and she can named the smell for each colors without me telling her. Good job, baby!

After playing for 2 hours, the playdough still remained soft and pliable. To further test the suppleness of this playdough, I've left a ball of dough overnight on the counter without covering it. When I checked on it the next morning, there was a thin crust formed on the surface of the playdough. But once I knead it, the heat from my kneading seemed to have melt the crust into the soft dough. The end result is the playdough still remained soft and pliable as it was yesterday. I am very happy with this playdough recipe. Definitely the BEST playdough I've ever played!

HOMEMADE SENSORY PLAYDOUGH FOR TODDLERS
(Recipe Source from Martha Stewart)

Prep Time  : 12 mins
Cook Time : 3 mins
Total Time : 15 mins
Makes       : approx. 4 balls of 7cm diameter

Ingredients:
2 cups flour
1 cup salt
1 tbsp vegetable oil
2 1/2 tsp cream of tartar
2 cups cold water
Food coloring
Artificial flavoring (optional)

Directions:
1. In a medium saucepan, combine well the flour, salt, vegetable oil, cream of tartar, and water.

2. On medium heat, cook the mixture for about (no more than) 5 minutes. Stirring constantly until the dough is the consistency of mashed potatoes. (It took me about 3 mins to get to the consistency of mashed potatoes)

3. At this point, your dough maybe still a little bit sticky. Knead it a few times while the dough is still in the saucepan, away from stovetop. The heat from the saucepan will continue to cook the dough whilst you are kneading.

4. Divide the dough into four equal portions and add your coloring and flavour according to your liking. I've added approx. 1 tsp of food coloring and 1/4 tsp of artificial flavoring into each portion.

Notes:
● To store, wrap each color dough with a cling wrap before placing them in a ziplock bag or airtight container.

● According to Martha Stewart website, it says that "If you store the play dough in a plastic bag or airtight container, it will stay nice and soft and last for years."

● Do not worry about your kids mixing different colors together. You can try to separate the color dough later. And if you can't, just knead it together to create a new color. :)


#msyummyliciousrecipe
Make this recipe? Don't forget to snap a photo of it and tag #msyummyliciousrecipe on social media! I would love to see them! Enjoy my recipe!


MY OBSERVATION

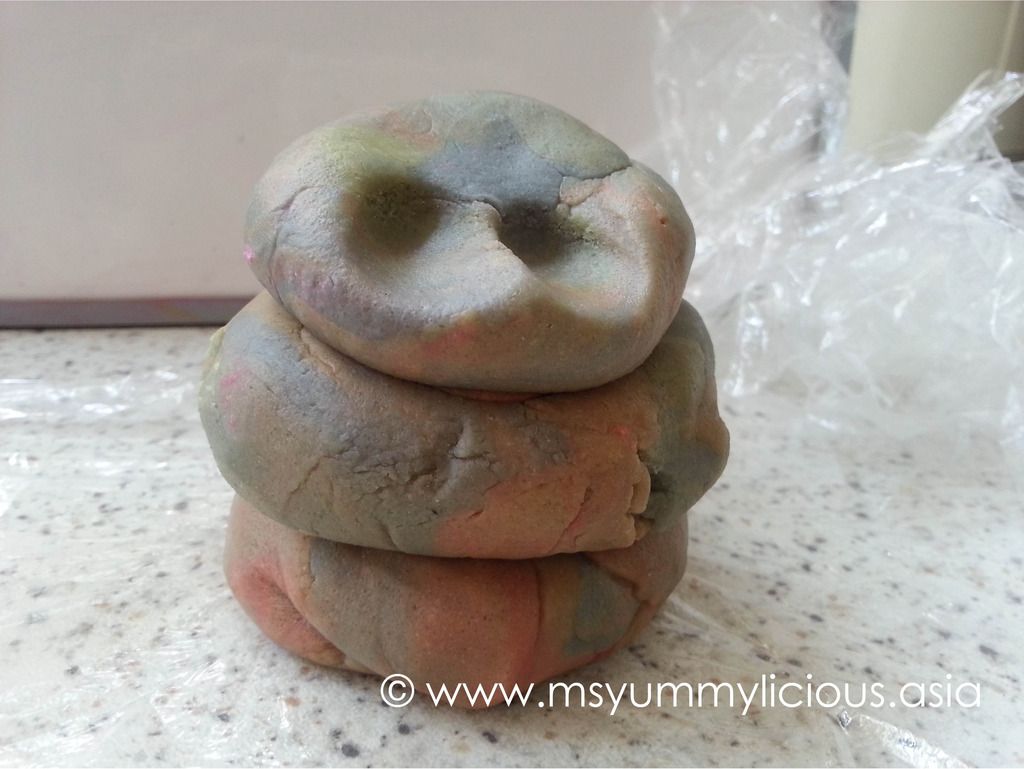
After posting up this receipe, an experienced mommy (whom has made this playdough before) told me that her dough got moldy after 5 days in room temperature and only lasted for 2 weeks when kept in fridge. Upon hearing this, I decided to do my own observation and comparison.

Note: Both dough are wrapped in cling wrap and kept in airtight container after each play.


Room Temp (Dough A) Fridge (Dough B)
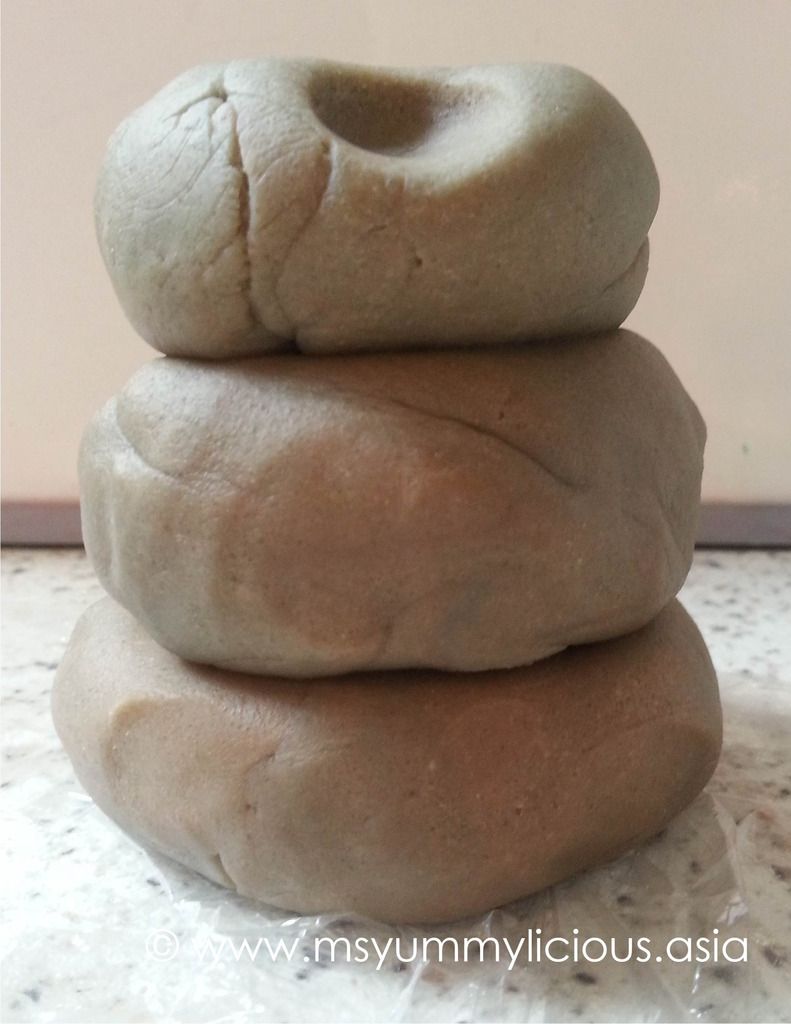
7 Days  photo DoughA7.jpgDough remained soft & clean
(The colors were all mixed up hence the dull color)
more details below...(+/-)
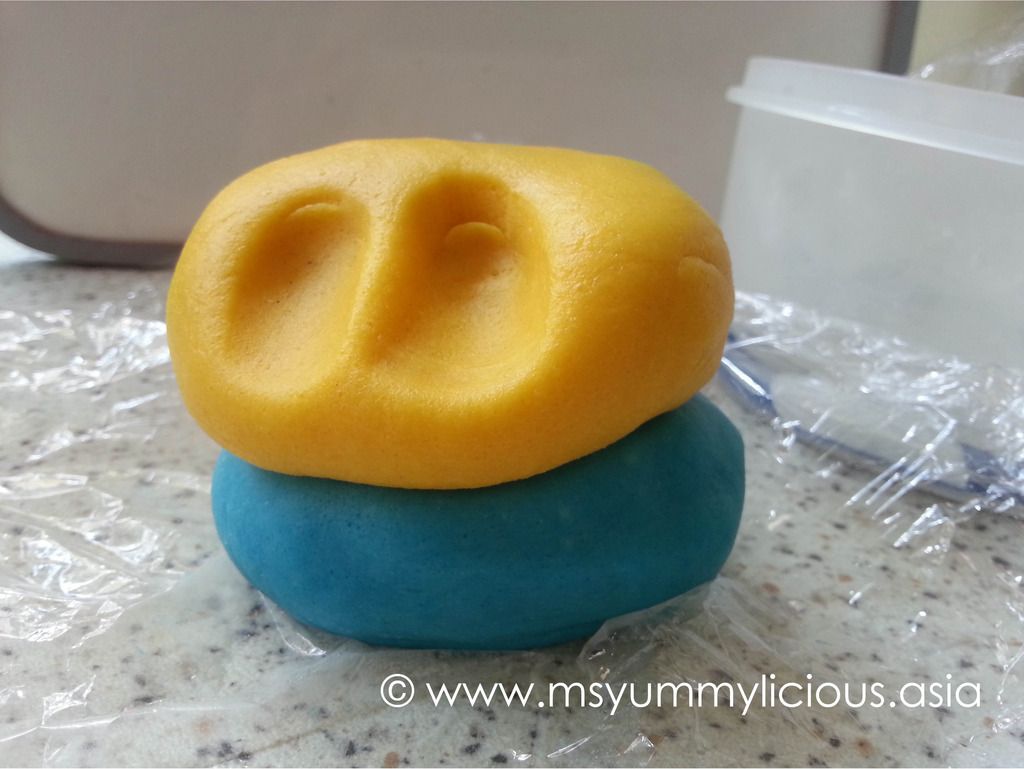
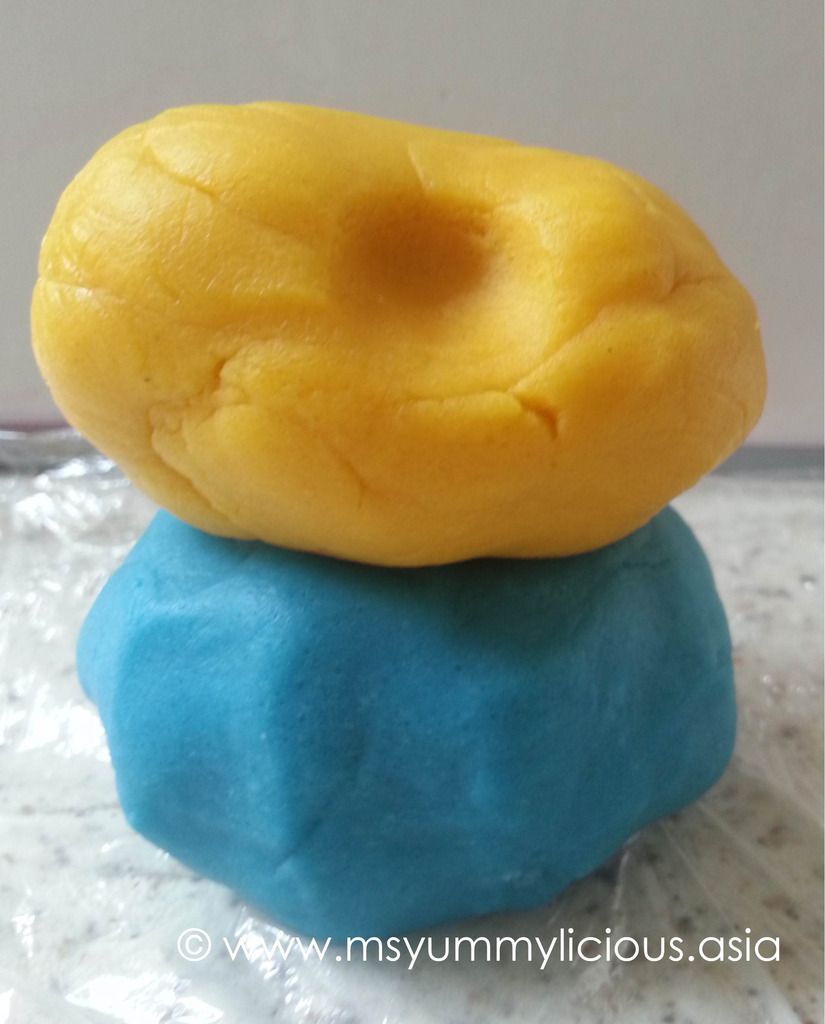
 photo DoughB7.jpg Dough remained soft & clean, and is slightly softer than 'Dough A'

more details below...(+/-)
2 Wks  photo DoughA14Days.jpg
Dough has harden a bit but still soft to shape & free from mold.

more details below...(+/-)
 photo DoughB14.jpg
Dough is tougher than last week but it is still soft to shape & definitely softer than 'Dough A'
more details below...(+/-)

Dough Untouched In Room Temperature
(Observation on the first 7 Days)

I've kept a small ball of dough untouched in room temperature (since the day i made them). It became very sticky. (See below photo.) I guessed we need to knead it once a while or perhaps maybe I did not knead it enough at the beginning. Hmmm...


Dough Untouched In Room Temperature
(Observation on the next 7 Days)

I was not happy that my daughter could not play with the 'sticky' dough. So I tried making them into a flat disc and leave it uncovered for the whole day under the fan. A thin crust has formed on the surface. I knead it to blend with the soft sticky of inside dough. After a few minutes, it became a smooth dough again. Yay! My daughter was able to play with it.


DOUGH B
(Observation on the first 7 Days)

Even tho' 'Dough B' is slightly softer than 'Dough A', but I found that it is very troublesome to have it thawed(*) first (for at least 4-5 hours).

In the first 1-2 hours of thawing, the dough began to sweat and become very sticky(**). Got to let it thaw further for approx. 4-5 hours to get a smooth dough (after kneading it again for few mins).

Ok. you may ask, what if I let my kid play right from the fridge? I've tried that and it doesn't work. When I let my daughter play right after taking it out from the fridge, the dough was nice to play with at first but in just few minutes, it became very sticky. (See photo below.)

The dough stick to the table and hands.

NOTES
(*) thawing condition: dough is unwrapped from cling wrap and left 'naked' on table.
(**) the dough may not sweat or may not sweat too much if the weather is cooler.


DOUGH B
(Observation on the next 7 Days)

My daughter was able to play with the dough right after taking from the fridge. Does not need thawing anymore and it doesn't feel sticky.

Conclusion of My Observation: The dough kept in room temperature (Dough A) was more lasting than the one kept in fridge (Dough B), in terms of pliable. It can last up to 3 months or more, provided that it is stored accordingly. I did not further test because the dough has become brownish color and my daughter wasn't interested in it anymore.

First Commenter...(+/-)

Wishing on a Falling Star

Homemade Churros With Choco Dipping


It has been raining since this afternoon (and is still raining now). The weather was really cooling and I couldn't ask for more appropriate weather to have these yummylicious lil' churros for tea time. I've make a warm choco sauce for dipping and it is certainly a great way to make your tummy smile.

I love the combination of the warm choco sauce against the crunchy churros exterior and soft interior. It is really yummy and super easy to make. Try this for yourself and I am sure you'll love it too!


HOMEMADE CHURROS WITH CHOCO DIPPING
(Recipe Source from Just A Taste)

Prep Time  : 5 mins
Cook Time : 20 mins
Total Time : 25 mins
Makes       : 20 pcs of 2" length

Ingredients:
For the churros:
1 cup water
1 1/2 tbsp sugar
1/2 tsp salt
2 tbsp vegetable oil
1 cup all-purpose flour

For the cinnamon sugar coating:
1/2 cup sugar
1 1/2 tsp ground cinnamon

For the chocolate sauce:
100g dark chocolate, chopped
1/2 cup heavy cream

Directions:
1. Combine and mix well the sugar and ground cinnamon in a shallow dish. Set aside until needed.

2. In a small saucepan over medium heat, whisk together water, sugar, salt and vegetable oil. Bring the mixture to a boil and then remove from heat. Stir in the flour, mixing until all flour well incorporated, forming into a ball dough.

3. Heat enough oil about 3-4 inches in a thick bottomed pot over medium high heat.

4. Transfer the dough into a heavy-duty piping bag with a large star tip. Pipe the dough about the length of 4 inches or your desired length over the hot oil and cut with a scissors to release it into the oil. Pipe 2-3 churros at a time. Fry until golden brown and thoroughly cooked. Drain in a paper towel and let it rest for few minutes before coating with the cinnamon sugar mixture.

5. Serve with warm choco sauce.

To make the choco dipping:
6. Place the chopped chocolates into a small bowl.

7. In a saucepan over medium heat, warm the heavy cream and pour into the chopped chocolates. Let it sit for a minute and stir till smooth.

Notes:
● If you don't have large star tip, you can omit it but you won't get the ridges like you'll get from the star tip.

● The dough is quite hard. You need to use heavy-duty piping bag or cloth pastry bag. If you use the regular piping bag, afraid that it might not be able to hold the pressure and split open when squeezed.

● When warming the heavy cream, be careful not to boil it. We just want the cream to be hot not bubbling.


#msyummyliciousrecipe
Make this recipe? Don't forget to snap a photo of it and tag #msyummyliciousrecipe on social media! I would love to see them! Enjoy my recipe!


First Commenter...(+/-)

MPG

Newborn Essentials - Your Buying Checklist

For the first-timer parents, buying stuffs for your baby can be really fun. I remember when I first shopped for my first born, I bought a cute little mitten & bootie. It was a very simple pair of mitten & bootie in stunning white color. What makes my heart really jump in excitement is that when I think of my babys' cute tiny hands and feet wearing them. Ahh.. how adorable it would be!

...if this product worth buying, is this product useful or does your newborn need this product...
With so many innovative baby products in the market, shopping for your newborn can be quite a headache. You may ask if this product worth buying, is this product useful or does your newborn need this product? My ex-colleague asked me, what are the essential items a newborn need. Her question makes me realized that my experience may be able to help other first-timer parents. You can use the below list as a guide when buying stuffs for your newborn. So what do you really need for your newborn?


1. Baby clothes
Your newborn skin is very delicate, bear this in mind when you buy baby clothes. Look for soft cotton, feel the material for yourself. You will need at least :
2 pcs newborn hat/ beanie.
4 - 8 pcs all-in-one pyjamas. (Night time)
All-in-one pyjamas is a suit with the hands and feets covered up. I found that this kind of pjs are very convenient. When you do not need to cover the hands, you can simply flip the end of sleeve.
4 - 8 pcs short sleeve onesies. (Day time)
Onesies are one piece bodysuit with wide head openings and snaps under crotch. Personally, I preferred onesies from the regular shirt. Because onesies snaps at the croth, it prevents the shirt from hiking up and revealing your newborn's belly.
Let your newborn (from 5th - 7th days onwards) wear short sleeve during the day to avoid getting heat rash.
4 - 8 pcs swaddle cloth. You may also use cloth diapers or receiving blankets but it might not be able to hold your newborn tight enough (depending on baby size).
While your newborn is trying to adapt to the new world, swaddling is an effective way to make him/her feels secure. It works like magic! Once swaddled, the crying stops. It is also a good way to avoid your newborn scaring him/herself with him/her own startle reflex.
(Video: How To Swaddle A Newborn)
1 - 2 pcs rompers/ outfit for outing
You do not need to buy a lot of outing outfits for your newborn. It is better to stay home for the first two months, or AT LEAST the entire first month. Let your newborn build up his/her immune system stronger first.
4 - 8 pairs mittens (For the first month)
You may banish mitten wearing after a month but make sure to trim your newborns' fingernails regularly to avoid scratching him/herself.
4 - 8 pairs booties/ socks
8 - 10 pcs soft handkerchiefs
Keep 2 pcs for bathing and the rest for daily use.
4 - 8 pcs diaper cloths
Diaper cloth comes in very handy as burp cloth. You can also use it as a base to prevent your newborn from getting your sweats while you are carrying him/her in your arms. Just put the diaper cloth on your hand, the inner part where you fold your arms before resting your newborn's neck on it.

Note : I shop mostly at MOTHERCARE for my babies' clothes. Love their colors, designs and materials! They have 3in1 pyjamas pack and 5in1 onesies pack which are really adorable.
Join MOTHERCARE VIP Club and you can enjoy additional 10% discount on top of their existing promo on Member's Day. (click HERE for more info)


2. Baby Nappies
Your newborn will need to be changed as many as 8 - 12 times a day. If you are planning to stock up diapers, please consider the below :
Sensitivity to certain type of material
You will need to try the diaper on your newborn first to know if it suits him/her a not. If your newborn get rashes, then switch to other brand.
Different brands has different sizing on newborn
Do not buy too many 'Newborn' size diapers at one time. Your baby will outgrown it very fast. Based on experiences, PET PET's newborn size can only fit up to 2 weeks. After that, will need to change to 'S' size. But Mamypoko's newborn size is bigger. It can fit up to the 6th week.
Diapers vs Cloth Diapers
Since newborn need to be changed frequently, diaper is the most ideal option. For my first born, I bought two dozens of cloth diapers but ended up not using them. (Instead I used them as burp cloths.) You do not need to be worried about insufficient air flow around your newborn bum bum. Nowaday, diapers are very 'high tech'. They have certain technology to ensure that there are sufficient air flow.
Cotton Wool And Wet Tissues/ Wipes
For the first 2 weeks, you may use cotton wool with warm water to clean your newborn during nappy change. After that, you can use wet tissues/ wipes which is more convenient. Just be sure to look for paraben and alcohol free.
Nappy Rash Ointment
My trusted nappy rash care would be Bepanthen. It has effectively
healed and prevented rashes for both my babies. I've also used it on mild milk rashes. It worked equally effective - rashes were gone the next day.
(Photo Source: Rakuten.com.my)
Other brand that you can consider is Soducrem. It is also effective in treating nappy rash but what I don't really like about it is that it will leave patches of white residue on the skin which are quite hard to remove, unless scrubbing it with a wash cloth during bath. (This is my personal review on Soducrem after using it for 2 weeks.)


3. Baby Bathing
Depending on the weather and humidity, you may want to bathe your newborn daily. Some says newborn do not need to be bathe daily, it really depends. You can opt for sponge bath for the first two weeks, as long as you wash the diaper area thoroughly during diaper changes.
(Video: How to Give Your Newborn A Sponge Bath)
A bath tub with anti slip mat
Bath tub is a good investment. Your baby can use it for as long as he/ she can fit in it. Mine was until 15 months old. After that she just uses the shower to bathe.
A small round pail
For cleaning diaper area and/or for sponge bath.
2 - 3 pcs bath towels
Besides looking cute, hooded towel comes in quite handy. You can purchase it if you come across any cute design that you like. But of course, the regular bath towel is also suffice to do the job.
Mild Head to Toe Shampoo
I love using Head to Toe shampoo. That way, I can just grab a bottle for bathing time, instead of two. Your newborn skin is very
delicate, it is recommended to use only mild shampoo. Buds Organic is a good brand for my babies (as well as my nieces). They have an Infant Care range which is specially formulated for newborn babies. You can try Infant Head to Toe Cleanser.
Massage Cream/ Oil
Infant massage is one of the great way to bond with your newborn. It is believed to promote better sleeping and relieve colic. You can use massage cream or massage oil, but I find that using cream will be better. For this, I am using Buds Organic Infant Cream.
(Photo Source: Buds Organic Infant Care)
(Video: How To Massage A Newborn)


4. Baby Feeding
Your newborn feed very, very frequently. This is because his/ her tummy is very small. Breast milk or formula is the only food your newborn needs. *You do not need to feed your newborn with water (until your baby is 6 months old). Your newborn will get all the necessary hydration from breast milk or formula.

BREASTFEEDING
READ MORE...(+/-)

Breast milk is the ideal food for your newborn because it is specifically tailored to your baby according to his/ her needs. It contains antibodies to help your newborn fight off viruses and bacteria.

Colostrum - the “premilk” that comes in after you deliver, is chock-full of antibodies to protect your newborn baby.

The hormone oxytocin, released during breastfeeding, acts to return the uterus to its regular size more quickly and can reduce postpartum bleeding. And that is why when breastfeeding during the first few days after delivered, mother will have cramps/ contraction. I had some painful contractions when breastfeeding on the first few days, but I told myself, "What pain is this compared to my labour pain? Just feed on!"

Mother will need to have a strong determination and perseverance to breastfeed her baby:-

- Breastmilk easily digested: Because of frequent needs in feeding, mother may think that she is not producing enough milk, hence baby is always hungry. This is not true! Your newborn can only take very little milk at one feed because his/ her tummy is still very small (See below picture on Newborn Tummy Size).
As mother continue to breastfeed, her body will produce more and more milk. The sucking/ latching will stimulate milk production - sending signal to her body to produce more milk. Sometimes, your newborn cries because he/ she just need to be comforted and only will feel secure at mother's breast.

- Negative inputs: Peoples around her may give her negative inputs, she needs to ignore them.

- Breast milk only kicks in few days later: For first-timer mother, her milk may not come until few days later, she may think that "I don't have milk". This is not true! Keep pressing on! Mother can try to do pumping and skin-to-skin contact with your newborn to stimulate the milk production. It is best to consult a lactation consultant.

- Sleep deprivation: Her newborn may need to be fed every hour and she will only gets 3 - 4 hours sleep in total per day. Don't worry, it will pass. Mother can try side latching especially for midnight feeds.
(Video: Side Lying Breastfeeding)

The above are only few scenarios that a mother might faces. There are still a lot of factors that can/ might dampen the mother's spirit to breastfeed. Daddy will need to FULLY support mother on this and give her more encouragements. It is best if both, the mother and daddy attend breastfeeding classes or equip themselves with more breastfeeding knowledge before welcoming their newborn.

(Read up on Golden Hour, Correct Latch, Breastfeeding Positions, Signs That Your Newborn Is Having Enough Milk, Hunger Cues, Milk Booster & Milk Killer Foods, Engorgement & Treatment, Blocked Ducts, Inverted Nipple, Power Pumping, etc...)


(Photo Source: https://blog.honest.com)

(*Source: Article: Baby Center - Should I give my newborn water or sugar water?
Article: 20 Breastfeeding Benefits for Mom and Baby
Article: Baby Center - How breastfeeding benefits you and your baby)


For the first month, you do not need to worry about expressing your milk out yet(unless you are having engorgement). You just need to focus on establishing a good breastfeeding rhythm with your newborn. Direct latching while having skin-to-skin contact with your newborn and feeding on demand are great way to kick start your breastfeeding journey.

You will need at least :
2 sets washable breast pads (Home use)
Milk leakage is very unpredictable. Some mothers will leak at the early weeks of breastfeeding, some will never leak and some might leak for many months. You will never know if you're leaking a not until the time comes. It is better to be prepared than having discomfort from your shirt all wet later.
(I bought mine at One Baby World @ RM10.30 (promo) for 2 sets. No regrets buying them!)
2pcs sleep bras (Home use)
Since you will not be going out on your first month, there is no need to buy a nursing bra just yet. Sleep bras will do and they are super comfy!
(Photo Source: One Baby World)
Nursing pillow
Nursing pillow is a must have for breastfeeding mom! It supported the baby and mother during breastfeeding so that they are comfortable. Nursing pillow comes in various designs and colours. The most common ones are - the horseshoe shaped (as per right pic) and the rectangle shaped or round shaped which wraps entirely around you. I have only used the horseshoe shaped pillow before (because back then this type is the only nursing pillow I saw in the market.) One setback that I encountered when using it is that my baby tend to slide away and fall in between me and the pillow. I thought "Why don't they put a strap so that I can securely strap it around my waist?".
And now, there are so many types of nursing pillows 'with strap or wrap around waist'. How wonderful!
But a mommy whom has been using this type of nursing pillow said that the strapping is quite troublesome. Yes, it has solved the problem of baby rolling away but it is not as convenient as the horseshoe shaped pillow where you can just take it or put it (back) in without having to secure anything.
(Photo Source: ToyRUs/ BabiesRUs)

LATER BUY (DL)
READ MORE...(+/-)

When you are ready to go out with your newborn, you will need :
2 - 3pcs nursing bras
Nursing bra has an inner circular opening to facilitate access for feeding and uses clips for easy single-handed access.
1 - 2pcs nursing wraps
Nursing wrap is very useful especially when you are dining outside and you need to feed your newborn. When not in use, nursing wrap can be styled as a pretty scarf.
Disposable breast pads
Using disposable breast pads than those washable ones would be better when you need to go out. It is a lot slimmer.


However, if you are unable to breastfeed directly/ direct latch (DL), (Examples: your newborn not latching well, his/ her suckle is weak - unable to stimulate milk production, your newborn has jaundice - need to be hospitalized, inverted nipple, etc...) then you will need to express out your milk. You will need :
A Reliable Breast Pump
A good breast pump is a breastfeeding mom's best friend! Find the one that suits you and be willing to invest in a good one. You will thank yourself later. An electric double pump would be most recommended. You can try to look up for these brands: Medela Freestyle, Spectra M1,Lacte Duet
(Photo Source: Medela Freestyle)
Storage bottles (BPA FREE)
If your expressed breast milk (EBM) is going to be consumed within the next few days, you can store it in the bottle in the fridge. You may also store in bottles if you are going to put it in freezer.
Storage bags (BPA free and pre-sterilized)
If you wanted to store your milk more than few days, you can store them in the storage bag and keep them laid down in the freezer. Storage bags enable you to store more milk because it does not take up much space in your freezer. Remember to look for Double Zip Lock bags to avoid spillage. Every drop is precious!
Milk bottles
For breastfed babies, they can be quite fussy about milk bottles and totally rejecting bottle feed if they don't like the teat. Tommy Tippee Closer To Nature Bottle is one of the good brands that mimic the natural flex and feel of a mother's breast. Its soft silicone teat is really super flexible and soft. Even I thought it feels like my breast.
Features you need to look for when buying milk bottles - BPA Free and Anti-Colic.
Once your newborn has settled down with a specific brand, then you can buy in numerous. You may buy 2 bottles 150ml/ 5oz and 2 bottles 260ml/ 9oz.
(Photo Source: Babydash.com.my)
Sterilizer
In the olden days, my mother would put the bottles submerged with water in a stainless steel pot and bring them to a boil. When the water has boiled, she would close the lid and off the flame. The bottles are kept inside the pot until needed.
Now, in our modern days, you just need to push a button. The sterilizer can keep bottles sterilized for up to 24 hours if the lid is unopened. My trusted brand would Philips Avent 4in1 Sterilizer. You may also buy 3in1 as the extra feature in the latest version is the dishwasher basket which is useless to me. I bought the latest version simply because I preferred the grey color than blue.
(Photo Source: Philips.com.my)

(Article: Breast milk storage: Do's and Don'ts,
Article: Breastmilk Storage & Handling)

LATER BUY (BOTTLE-FED)
READ MORE...(+/-)

When you are ready to go out with your newborn, you will need:
A cooler bag
A compact cooler bag to store your breast milk.
1 - 2 ice packs
To keep your breast milk cool.
(Photo Source: Pupsik)
A thermal flask
To store hot water used for warming your breast milk.
A insulated mug
Warm your breast milk by pouring hot water in the mug and put your bottle in it.


OTHER BREASTFEEDING ACCESSORIES
READ MORE...(+/-)


Nipple Shield
Nipple shield is a soft silicone nipple that is worn over the mother’s nipple during a feeding. You will only need nipple shield if your newborn is not latching well, sore nipples, etc. It should be used under the guidance of a lactation consultant.

Milk Collector/ Milk Saver
Milk collector is worn inside a bra and it collects excess milk when your milk is leaking. You may also wear it during feeding or pumping.
(Photo Source: Pupsik)

Thermo Gel Pads
These gel pads will help to ease your discomfort from engorgement, blocked ducts in the most convenient way.
Warm therapy stimulate milk production. By doing a warm therapy on engorged breast before pumping, it will soothe the discomfort, making it easier to pump.
Cold therapy reduce swelling and inflammation, producing a healing effects.
You may also use home remedy. For warm therapy, take a warm shower or a towel soaked with warm water. For cold therapy, you may use cabbage and chill it in refrigerator.

Freemie Cups
Freemie enable you to pump hands free. And you can pump with your shirt on too. It's really convenient if you want to multitask. Freemie cups is compatible with most pumps. Check out the listing HERE.
(Photo Source: Amazon)


FORMULA-FED
READ MORE...(+/-)
"For mothers who are unable to breastfeed or who decide not to, infant formula is a healthy alternative. Formula provides babies with the nutrients they need to grow and thrive."
- source: http://kidshealth.org/parent/growth/feeding/breast_bottle_feeding.html
Things that you need :
Milk Bottles
Features you need to look for when buying milk bottles are BPA Free and Anti-Colic. I love PHILIPS AVENT Newborn Starter Kit. It has 2 x 260ml/9oz Bottles 1m+; 2 x 125ml/4oz Bottles 0m+; 1 bottle brush and 1 soother. While I was googling for the starter kit photo, I've stumbled across a super cool deal - Philips Avents 4 In 1 Electric Sterilizer And New Born Starter Set FREE Hanging Mobile Toy @ RM551.76 ONLY (NP: RM689.70). Click HERE for more details.
(Photo Source: GEMFIVE)
Sterilizer
(pls refer to BREASTFEEDING: BOTTLE-FED: Sterilizer)
Hot Water Dispenser/ Thermo Pot
You will need to have access to hot water anytime of the day for making milk or warming milk. It would not be ideal to only boiling the water when you needed it. Your baby would be crying at his/ her top lung. A thermo pot would be the perfect appliance to do the job - that is to keep the water hot all day.
(Photo Source: Best Reviews)


5. Baby Bedding
This is my favorite part! I love decorating my baby's cot although they ended up not using it. (My daugther co-sleep with us, while my son at the moment is sleeping in a bassinet.) A nicely decorated cot gives me a sense of accomplishment and reminds me that my baby will be joining us very soon.

Notes:
● Pillow is not recommended for baby below 1 year old.
● Avoid too much blankets/ bedding in the cot to avoid suffocation.
● Place your baby to sleep at the foot of the cot to prevent baby moving under the covers.

A cot
If you are having doubt about getting a white color cot in fear of discoloration, don't worry. Ours is a white wooden cot and it is still looking as stunning as it was when we bought it 4-5 years ago. To clean, just use a slightly damp cloth followed by a dry cloth to wipe at least once semi-annually.
You may want to look for a cot that can convert into a toddler bed later. This will be easier and cost efficient for you because your baby will only be sleeping in a cot until maybe 18 months old. (But I think most of the cots now are designed for both usages, just ask to be sure)
(Photo Source: The White Company)
A mattress for cot and waterproof mattress protector
A firm mattress will supports your baby growing bones and reduce the risks of SIDS. In terms of durability and comfort, I personally
think that latex mattress is the best. And to protect your mattress, you can buy a waterproof mattress protector.
A mosquito net stand and netting
Beside adding design to your already good looking crib, a mosquito net protect your newborn against mosquitos and other insects.
(Photo Source: EUCAliptosnon)
2 - 3 pcs bedsheets and blankets
By having extra bedsheets and blankets, you do not have to worry about your newborn wetting the said items. You can just have it replaced immediately.
A bassinet (For Daytime sleeping)
A bassinet with a removable basket is a good buy. You can place your newborn to sleep on the bassinet during daytime and remove the basket to take along to your in-law house or use during *travelling.
(Photo Source: BabiesRUs)
Note: *to be used in hotel and not in a car.


6. Baby Grooming & Safety

Baby Nail Scissors
Depending on your baby, you may need to start trimming his/ her nails (hand & Feet) at 2 weeks old. A nail scissors is perfect for this job. It is easy to use and I really think that it is safer than the nail clipper. Just got to pull the skin underneath the nail to the back when cutting the nails and you'll be fine.
(Photo Source: Sweetcouch)

Ear Thermometer
This is definitely a must have item in your list! When you are unsure whether your newborn is having fewer or it is just you feeling hot, just pop this in his/ her ears and check to be sure. I bought this Braun thermometer 3 years ago and it is still working good. But bear in mind that taking temperature from the ears may not be the best accurate. For most accurate temperature taking, you may want to buy a rectal thermometer.
(Photo Source: Which?)

Infant Car Seat
When you bring your newborn back home from the hospital, you will need an infant car seat. Most of the infant car seat comes in set with a stroller. It is a 2in1 usage. You can attach the car seat to the stroller and push it around or you can detach the car seat to be carried around or/and install in the car.


7. Baby Medication

Yu Yee Oil
As practiced by my family, we use Yu Yee oil on babies when they have winds or bloated stomach. Yu Yee Oil is a herbal medicated ointment use traditionally to relief winds and bloated stomach in babies. To use, pour a few drops onto your palms and rub your palms together to warm up the oil. Stroke your baby's stomach, circling his/ her belly button in a circular motion.
If your baby is colicky, apply on the back and feet as well. Do not pour the oil directly on the skin. Use the same method as for stomach. After applying Yu Yee Oil, make sure not to expose the area to winds.
(Photo Source: Watsons)

Sterimar Baby Nasal Spray
Sterimar is a mommy's life saver, I would say! It was introduced to me by my daughter's pediatrician when she got stuffy nose at few days old. Being a first time mom at that time, I was really helpless when my daughter has blocked nose or congested nose. Sterimar works like a 'Magic Solution'. Whenever my baby got stuffy nose, I just need spray this seawater solution into her nasal. The seawater solution will loosen up the mucus and within minute, it will come out itself.
(Photo Source: Rakuten)

Dentinox Infant Colic Drops
My younger daughter was a very very colicky baby. We had tried almost all colic drops available at pharmacy. Of course, we did some goggling on the colic drops first before trying it on our darling daughter. The colic drops that seems to work best on her is this Dentinox.
(Photo Source: Rakuten)
(Article: Colic - How To Cope?)

Vicks Baby Balsam
Vicks help to soothe and relax your baby. I've been using it for my babies since birth. However, the description on the box said it is suitable for babies from 3 months to 5 years. So, if you wanted to use this on your newborn, do consult your baby pediatrician first.
(Photo Source: Watsons)


8. Optional

1 - 2 pcs babywearing wraps
Babywearing can benefit both the mommy (& daddy) and baby. Read more about it HERE.

2 - 3 pcs infant binder
It is believed that tummy binder keeps the baby's tummy warm and prevent colic. I'm not sure about this, but I used it for my babies on their first month because I don't want my newborn babies' belly button to be exposed to winds.
(Photo Source: City Baby)

Cot bumpers
Although the safety of the cot bumpers is questionable as it can trap heat in the cot, I have used it to protect baby from knocking directly onto the hard surface of the cot frame. What I do is that I covered 3 sides of the cot, leaving one side uncovered. I've grown up seeing cot bumpers in the cot and all my cousins and nieces are growing healthily. I am not saying that nothing happen then you can consider it is safe. Just use it wisely and at your own risk. Remember to tie the bumpers to the frame so that your baby will not be able to move it around and cause suffocation.
In another article from Baby Centre, it is stated not use cot bumpers. There's no evidence that they prevent injuries. However research has shown that they may cause overheating, strangulation or suffocation.

That's about it! If you have any question/s about this list, please leave me a comment at below. I will be glad to reply you. Otherwise, have fun shopping!


Disclaimer: All the photos in this post are taken randomly from the said source for reference ONLY.

First Commenter...(+/-)

.....


Blogger Widget